Seek Outside
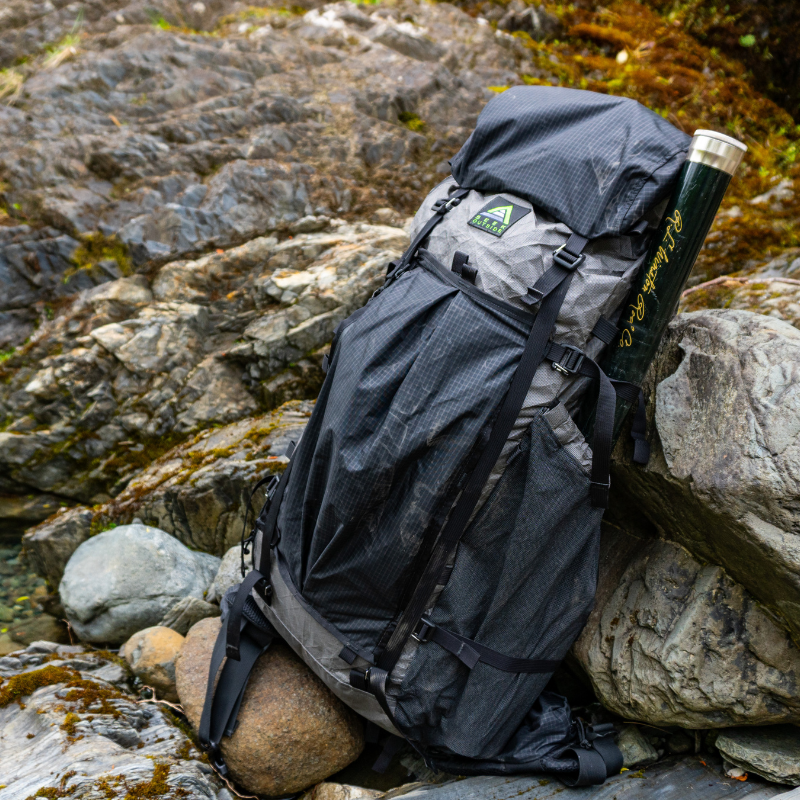
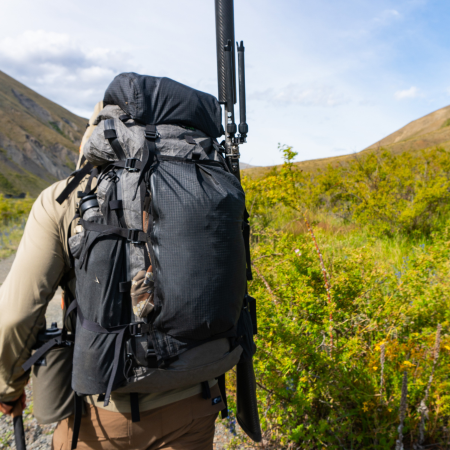
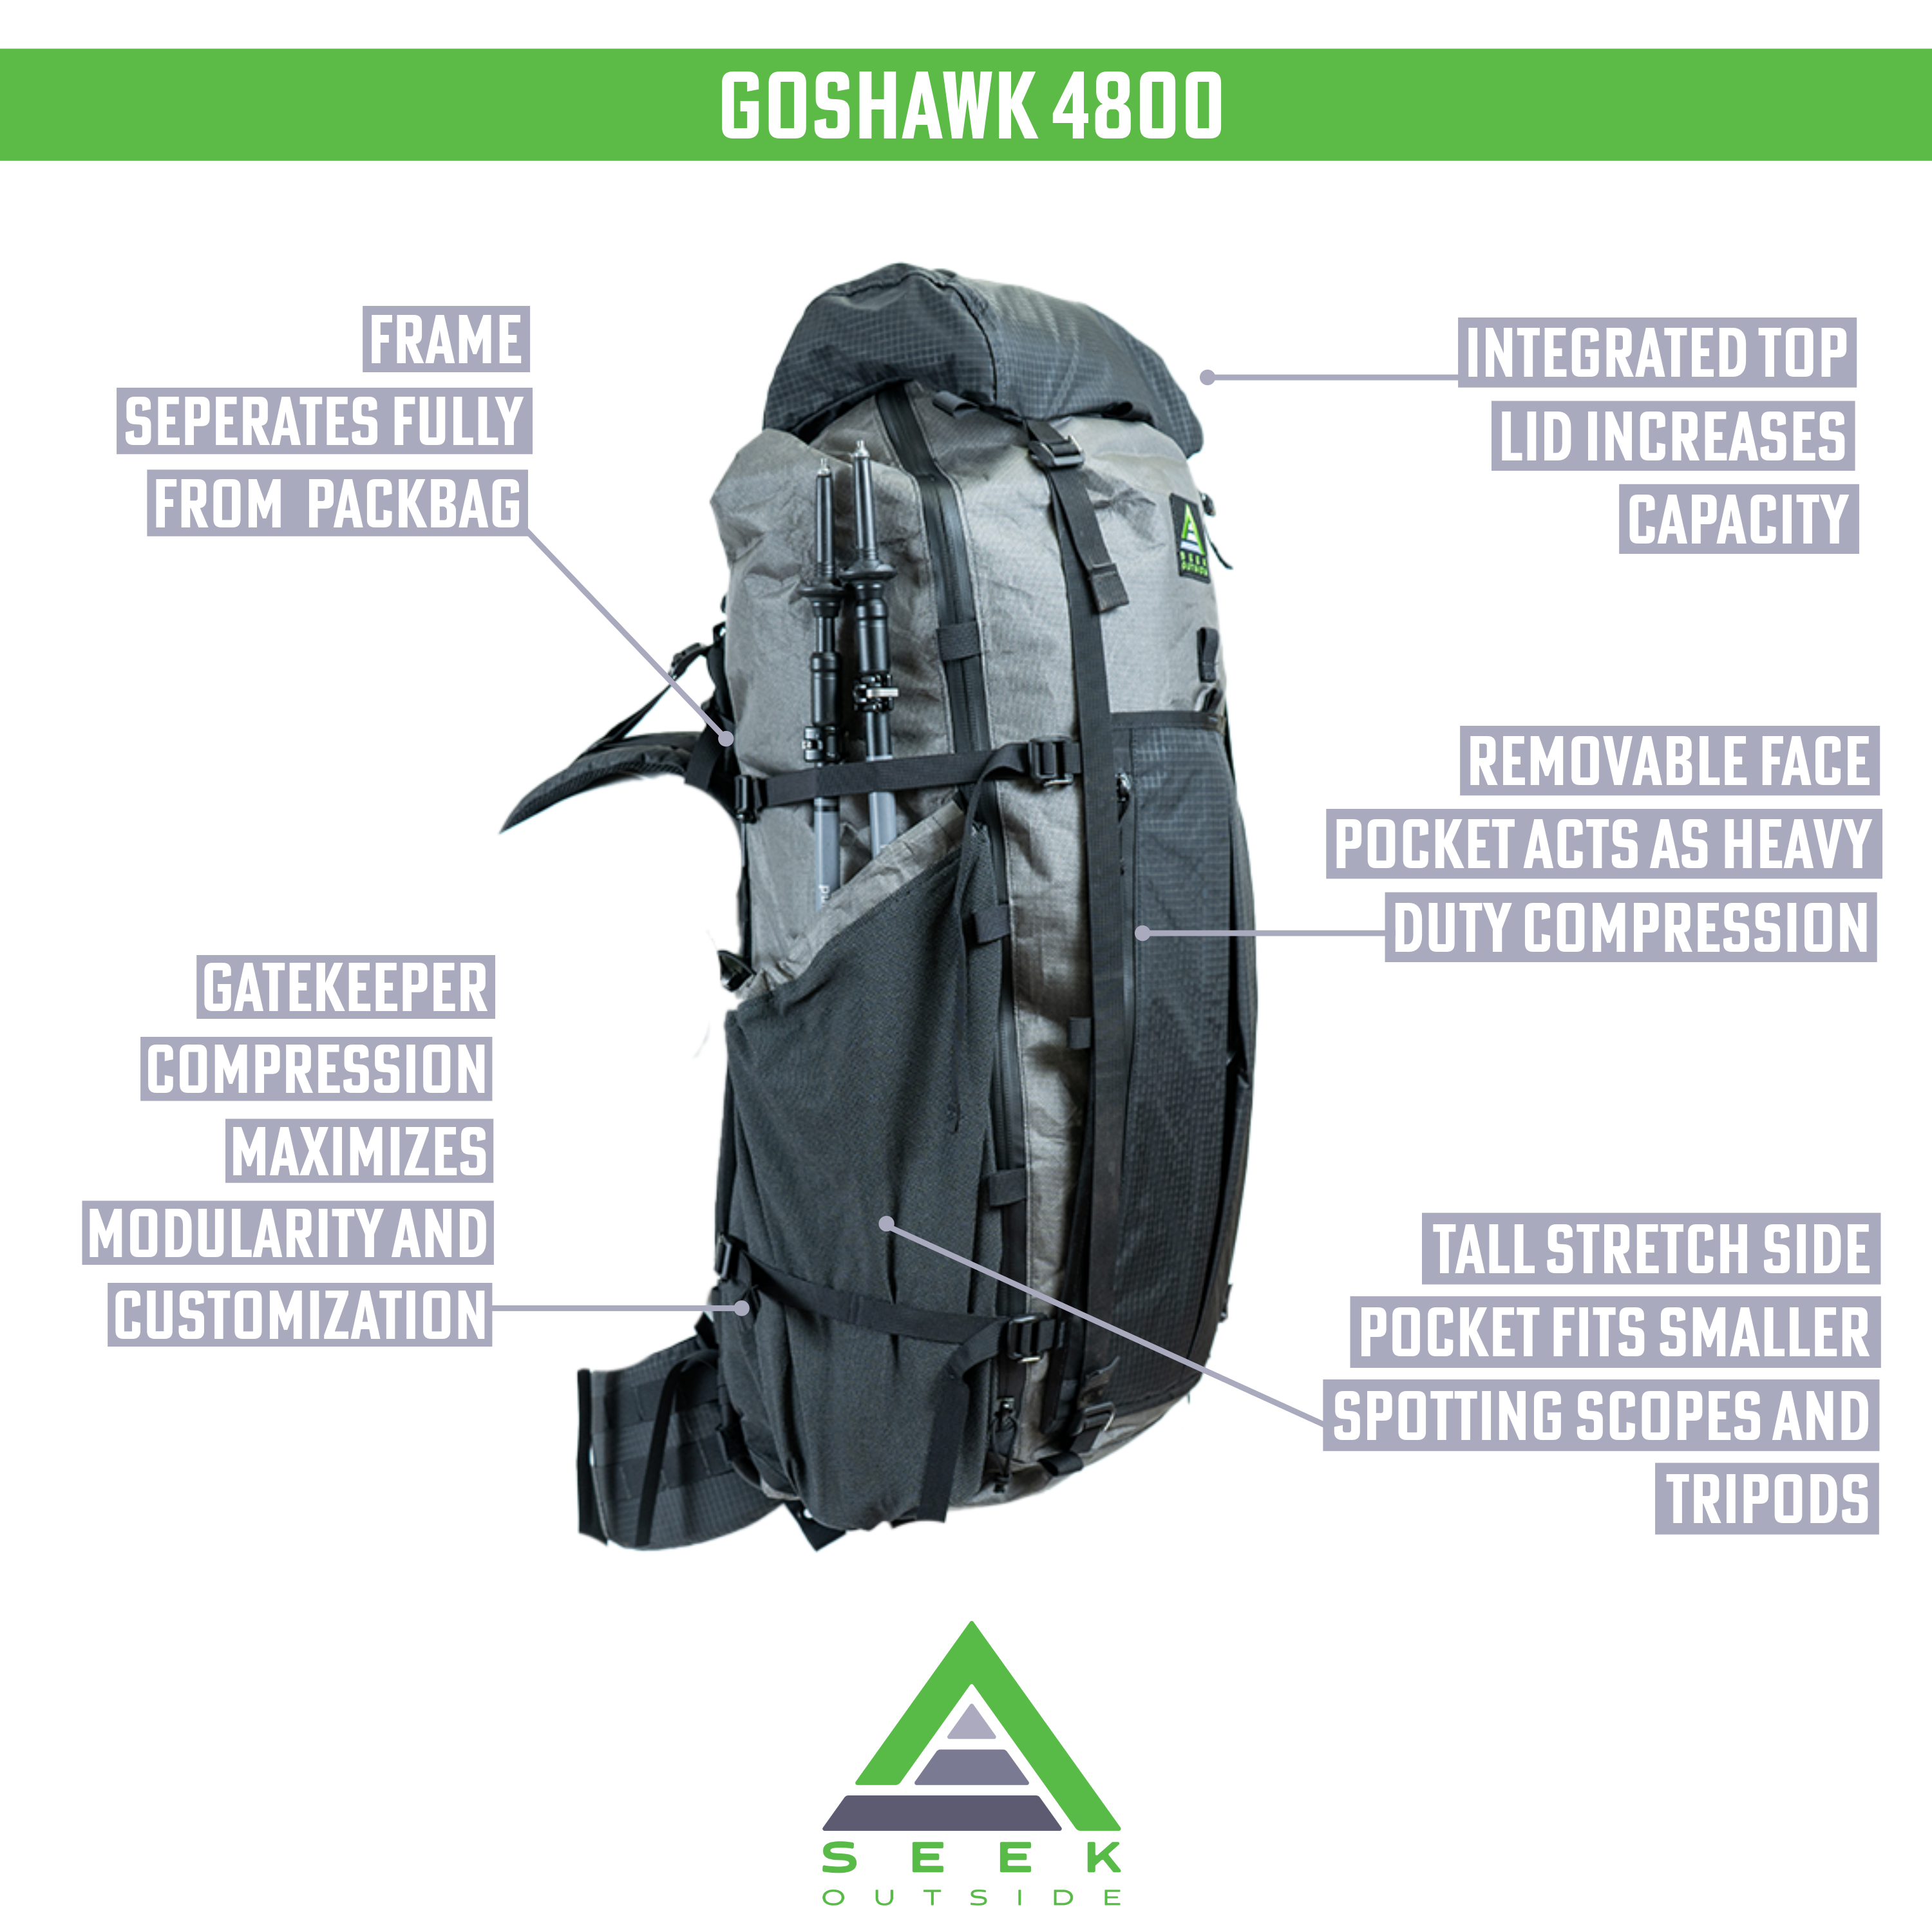
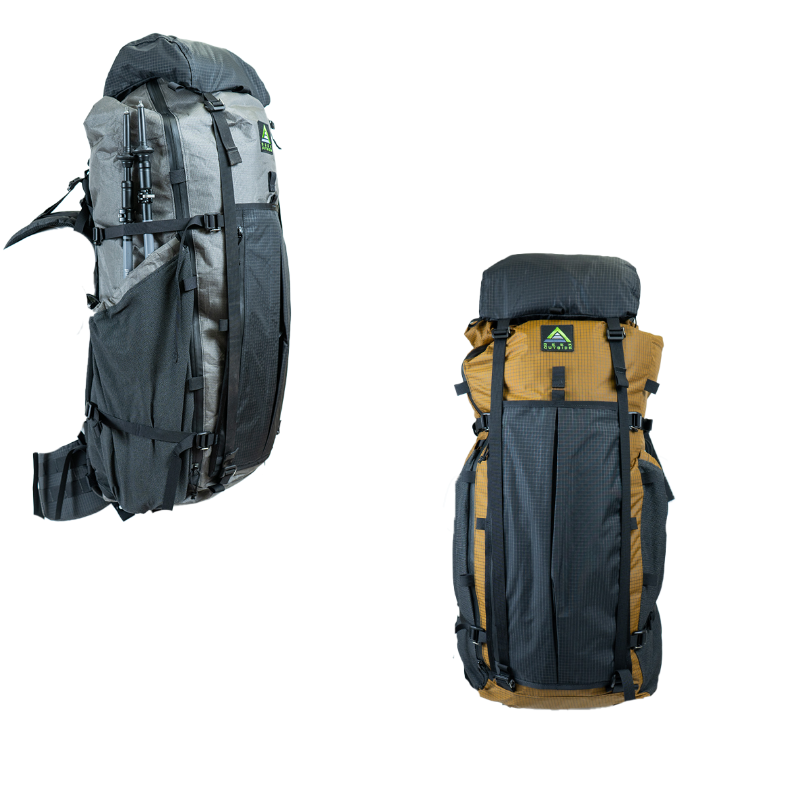
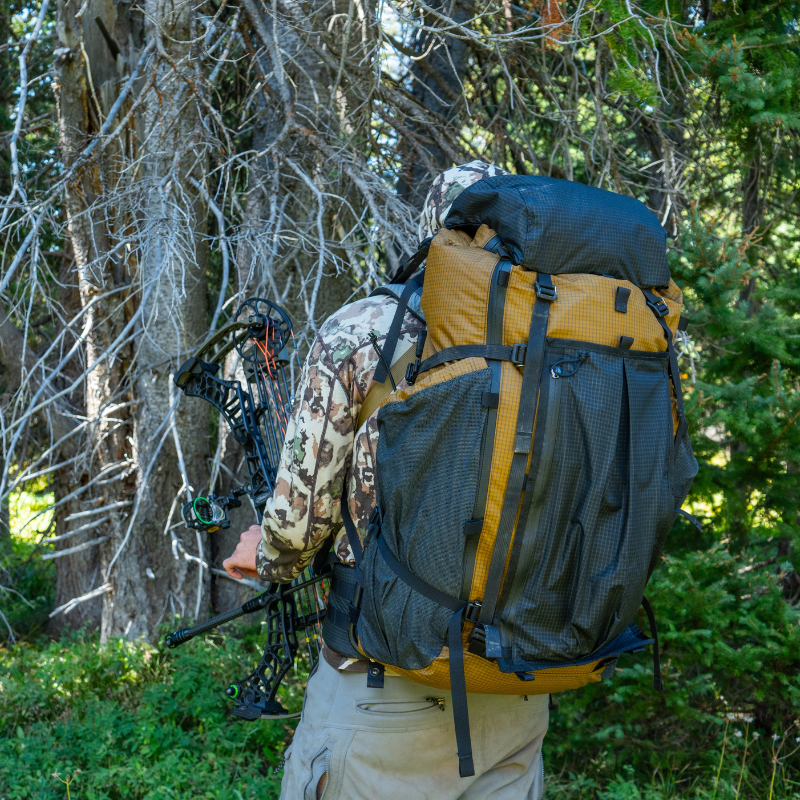
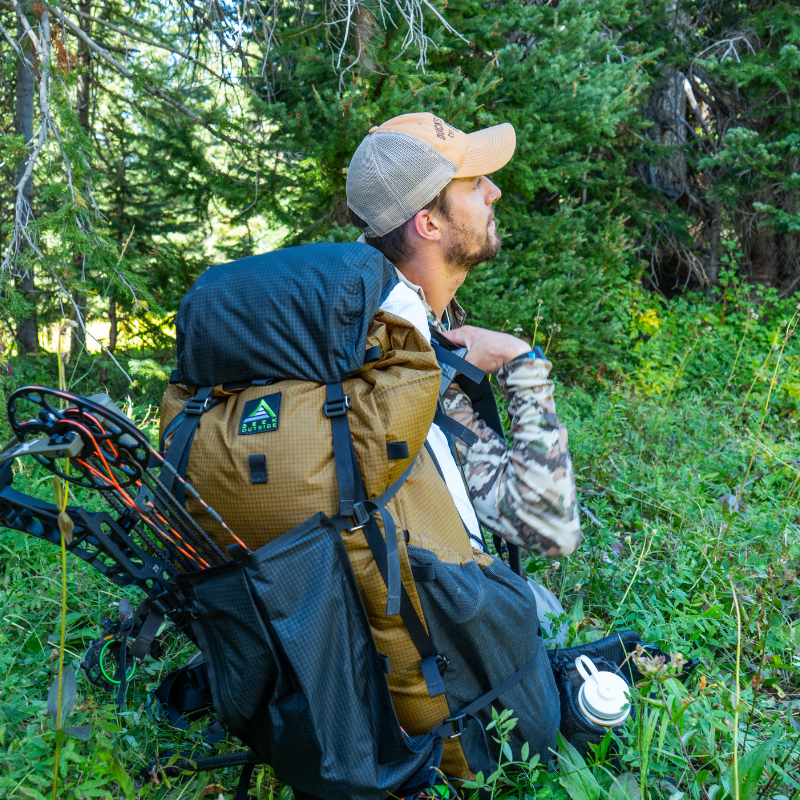
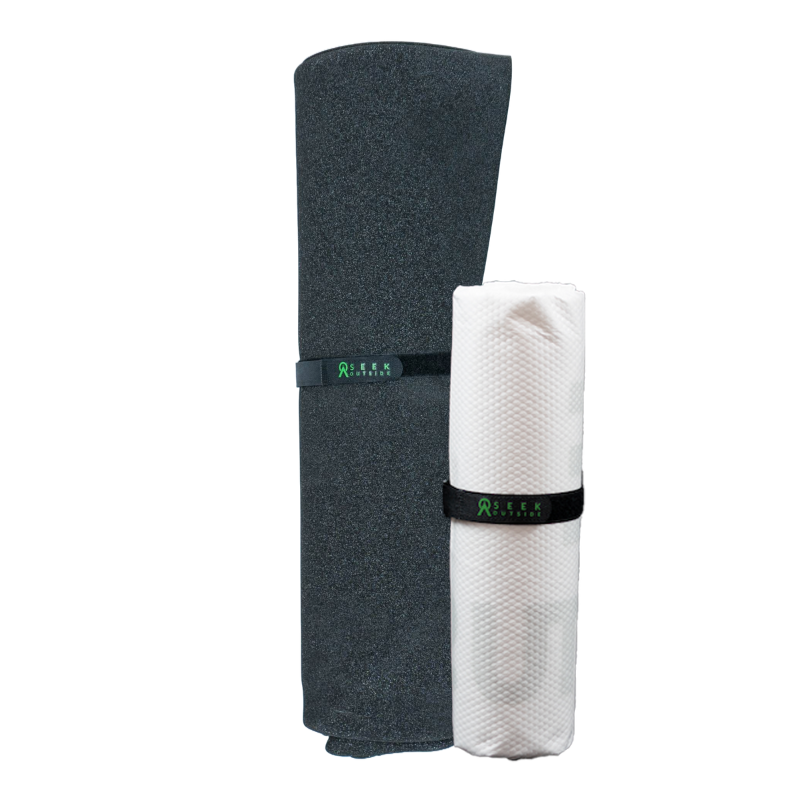
The Goshawk 2.0 is part of our revised 2.0 series of backpacks, featuring two fabric options, Ultra Grid™ and Ultra 200X™. The Goshawk 2.0 features updated tall side pockets made from UltraStretch™ fabrics for extra durability and variable volume. As well as a revised single forward pull hip belt closure. The main pack bag features a two way side zipper access with rolltop closure, the Goshawk has simple organization and is highly water resistant. The included Top Lid and Talon allow for more precise organization, and extra volume but are removable to remove weight on trips where every ounce counts. Our Gatekeeper compression straps allow for modular compression across the sewn loops on the pack bag and frame. These straps easily allow the pack bag to be shrunk down to a day pack. The Revolution frame is the center of the Goshawk 2.0 and is completely removable from the pack bag and can be used as a load hauler for dry bags or for hunting. Loads can be put in between the Goshawk pack bag and the Revolution frame.
Watch the Goshawk 4800 2.0 Overview here
Need a size bigger? Check out the Goshawk 6300
Handmade in Grand Junction, Colorado ![]()
Our frame will support over 300 lbs in vertical load. YOUR max load will be determined by your body, not by the pack.
Hipbelt, and shoulder harness are 200d Ultra™ grid which provides exceptional tear-strength and visual impact. UltraGrid™ has a C0 DWR coating, free from toxic PFCs, and is finished with a waterproof 1500mm PU backing. Ultra™ grid reduces weight and doubles tear strength, compared to other gridstop fabrics on the market. Gram-for-gram, Ultra™ has a tensile strength 15x stronger than steel.

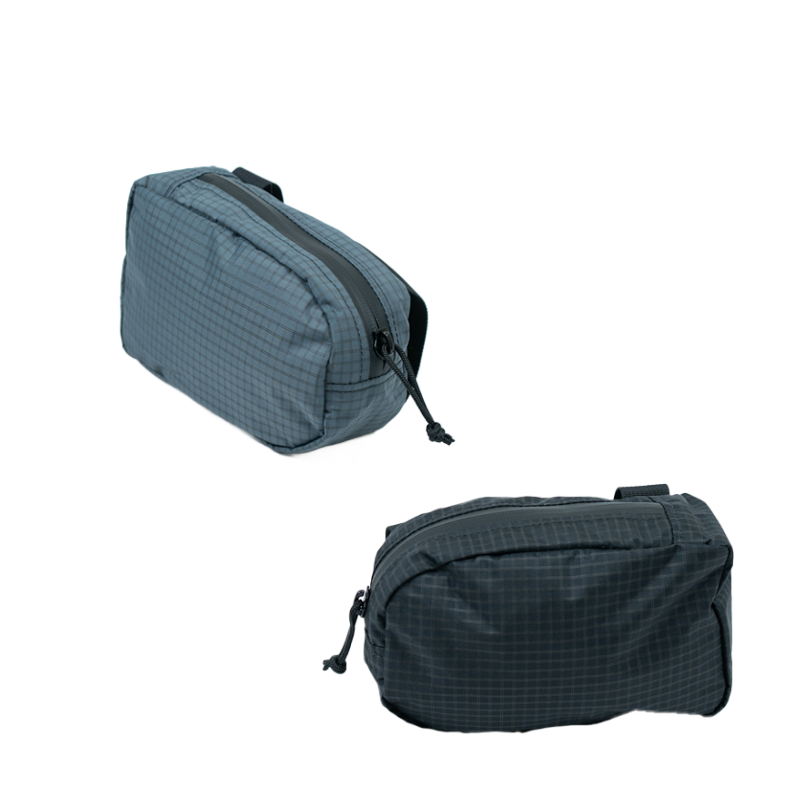
Included with Backpack:
Check out our Backpack Fit & Instructions Page to find many videos that cover common questions and give in depth information.
Fitting:
A good fit requires several things:
After fitting the pack to your body, you can tune comfort with three hard breaks. These adjustments drastically change the feel of the pack and users typically have a strong preference for each of these.
This is good because it speeds the adjustment process....if you don't like the way the pack feels change one of these and it will feel very different.
These cause hard breaks in the feel of the pack:
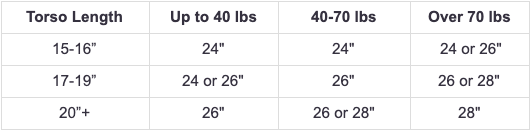
Achieving a good fit starts with the correct torso length. To read in-depth about torso length, adjustable frame height, and load ranges, see Which Frame Height is Right for Me?
Torso length is the distance from C7 (the prominent vertebrae at the base of your neck) down the spine to an imaginary line drawn connecting the points of the hips (iliac crests). Common measurements for a 6' tall male would be 17 to 19", while a 5'5" female may be 15 to 16", though these measurements vary widely based on body composition.
Match your torso length with the correct frame height for your expected load ranges. One advantage of our Field Adjustable Frame Height is that you can shrink the pack down for day loads and expand the height for heavy loads on the fly.
Frame height preferences vary person to person, so be sure to experiment and see what YOU prefer.
Shorter frames give less shoulder lift (upward angle to shoulder strap, lifting the harness), but they give you more freedom of movement to look sharply upslope, and snag less on overhanging branches.
Taller frames give more shoulder lift, but also can limit head movement and snag more.
In general users often prefer shorter frames for lighter loads and taller frames for heavier loads, but preferences vary.
People wear hipbelts high and low. This can change their effective torso height and throw off the guidance above. So using the frame height relative to the ear can be a better guideline in some cases.
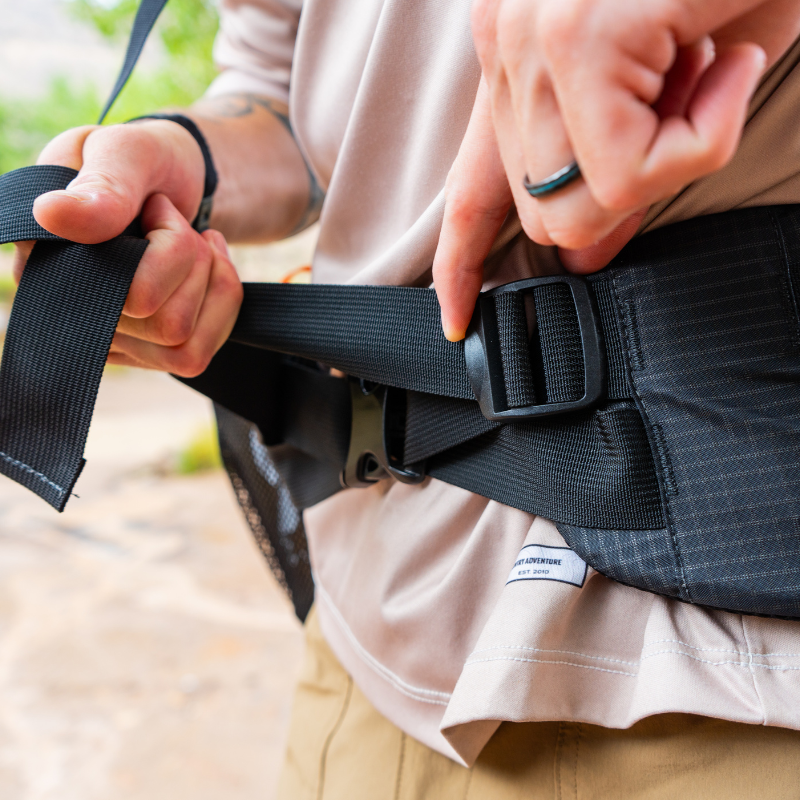
The padded portion of the hipbelt should wrap around the front of your hipbones, yet not so far that you run out of webbing adjustment. Consider seasonal use and clothing worn when selecting your size.
Most users want to center the hipbelt over the points of the hips. This is an excellent starting point for belt position on the body.
Hipbelts are connected to the frame with a grommet and screw. The Hipbelt has three grommets - a high, medium, and low.
Many users prefer the highest position to raise the frame up relative to the belt, but again preferences are all over the board here. If the belt isn’t comfortable try a different position.
Lumbar Pad vs No Lumbar Pad - you will probably strongly prefer one or the other. Telephone pole builds (flat back, straight up and down) often prefer no lumbar pad, while curvy or beefy builds often prefer the lumbar pad.
Captured vs Floating Belt - Captured can only be done WITH a lumbar pad. Floating can be done WITH or WITHOUT a lumbar pad. Less significant than the lumbar pad in changing the feel of the pack, users still usually prefer one or the other. Captured keeps the hipbelt upright and can help prevent the 3D mesh face from collecting snow or pine needles.
Floating vs. Captured Harness - the straps that adjust torso height have holdfasts on the suspension that secure the harness. Two adjustments can be made to free the harness.
To free the harness:
These two changes move you from a captured / stabilized harness to a floating harness. People who prefer a floating harness often roll their shoulders forward when hiking, and the extra give in the harness system conforms to their upper back better.
One final tip - Users who prefer no lumbar pad often prefer a floating harness.